顔でマウスを操作する 2
投稿者:マーチン 2019年10月20日
カテゴリ:上肢障碍者向け
カテゴリ:上肢障碍者向け
顔認証でマウスを動かすことのできるもう一つのソフト”Enable Viacam”も試してみたので、紹介します。前出の”Camera Mouse”と機能も認識率も大きな差はないですが、ユーザーアカウント制御(UAC)を無効にしないと動作しない時点で、アウトです。
【富山リハ病院】新しい mause を探して 後半 を参考にさせていただいています。
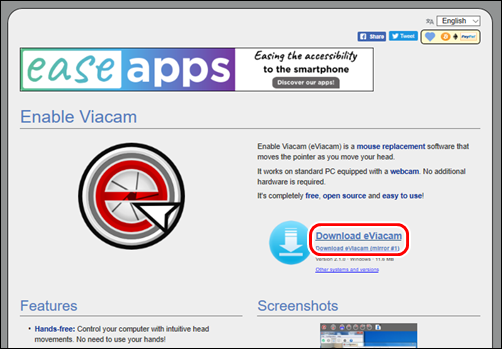
●Enable Viacam とは
https://eviacam.crea-si.com/ からダウンロードできます。
◆説明
Enable Viacam (eViacam) is a free open source software that allows you to move the mouse with your head. This application is useful, especially for people with disabilities.
"Enable Viacam(eViacam)"は、マウスを頭で動かすことができる無料のオープンソースソフトウェアです。 このアプリケーションは、特に障害を持つ人々にとって便利です。
The only requirement is a webcam and that's it. Main features of the program are: the ability to control the mouse pointer with head movements, it works with wireless webcams, has it's own wizard that will help you to configure your webcam, you can customize pointer speed, motion acceleration, smoothness, dwelling time and other options.
必要なものはウェブカメラだけです。 プログラムの主な機能は次のとおりです。マウスポインターを頭の動きで制御する機能、ワイヤレスWebカメラで動作し、Webカメラの構成を支援する独自のウィザードがあり、ポインター速度、モーションアクセラレーション、滑らかさ、滞留時間および他のオプションをカスタマイズできます。
The program work with Microsoft® Windows® with most recent versions such as 2000, XP, Vista, 7 and also on Linux operating system. The program is also available in many languages.
このプログラムは、Microsoft®Windows®、2000、XP、Vista、7などの最新バージョンで動作し、Linuxオペレーティングシステムでも動作します。 プログラムは多くの言語でも利用可能です。
◆Enable Viacam レビュー
Download Enable Viacam, connect your web cam (for external USB web cam) and run the installer. After installation, the program will create a desktop icon named "eViacam".
”Enable Viacam”をダウンロードし、Webカメラを接続して(外部USB Webカメラ用)、インストーラーを実行します。 インストール後、プログラムは「eViacam」という名前のデスクトップアイコンを作成します。
Open it and your camera should focus on your head. Also, a wizard configuration window will open. Follow all the steps. Choose "Next" to continue, the first window is with camera settings.
それを開くと、カメラが頭に焦点を合わせます。 また、設定ウイザードが開きます。 すべての手順に従ってください。 「次へ」を選択して続行します。最初のウィンドウにはカメラの設定が表示されます。
Your camera should work with at least 25 fps (more info provided in that window) so if you see more than 25, choose "Next". In the next window leave the default option selected "Locate face automatically" and move on.
お使いのカメラは少なくとも25 fpsで動作する必要があります(詳細はそのウィンドウで提供されます)。25を超える場合は、[次へ]を選択します。 次のウィンドウでは、デフォルトのオプションである「顔の自動検出」を選択したままにします。
When you reach "Pointer Calibration" window you have to move your head as instructed in order to configure the apropriate motion parameters. It will ask you to move your head to right-left and then up and down.
[ポインタのキャリブレーション]ウィンドウに到達したら、適切なモーションパラメータを構成するために、指示に従って頭を動かす必要があります。
頭を左右に動かしてから上下に動かすように求められます。
Note: Use slow but steady head movements. The web camera will track the movement of your head. For best results don't make quick, jerky movements.
注:ゆっくりですが、安定した頭の動きを使用してください。 Webカメラは頭の動きを追跡します。 最良の結果を得るには、素早くぎくしゃくした動きをしないでください。
Choose "OK" and you will be able to adjust the parameters manually in the following window (or later). This window will explain how the program use the "click" feature.
[OK]を選択すると、次のウィンドウ(またはそれ以降)でパラメータを手動で調整できます。 このウィンドウは、プログラムが「クリック」機能を使用する方法を説明します。
This is the last step, Enable Viacam will start automatically and you can move your head in any direction you want - the mouse pointer will follow you. Thanks to this utility, you control the mouse using your web camera.
これが最後のステップです。"Enable Viacam"が自動的に起動し、頭を好きな方向に動かすことができます-マウスポインターが追従します。 このユーティリティのおかげで、Webカメラを使用してマウスを制御できます。
From main software interface you can run the "Wizard" again or adjust the "Settings" manually (go to "Configuration" and select "Options").For best results you have to play a little with "Profile Options".
メインソフトウェアインターフェイスから、「ウィザード」を再度実行するか、「設定」を手動で調整できます(「構成」に移動して「オプション」を選択します)。最良の結果を得るには、「プロファイルオプション」で少し実行する必要があります。
You can adjust the motion calibration, workspace, click settings (dwell time and area) or other advanced features (you can even choose a different on-screen keyboard - other than the one included in Windows).
モーションキャリブレーション、ワークスペース、クリック設定(滞留時間と面積)またはその他の高度な機能(Windowsに含まれているもの以外の別のオンスクリーンキーボードを選択することもできます)を調整できます。
Conclusion: I tested this software on Microsoft® Windows® XP and 7 using an external USB camera - Microsoft® LifeCam HD-6000. This is not a program made only for people with disabilities.
結論:外部USBカメラであるMicrosoft®LifeCam HD-6000を使用して、Microsoft®Windows®XPおよび7でこのソフトウェアをテストしました。 これは、障害を持つ人だけのために作られたプログラムではありません。
You can use Enable Viacam with other automation scripts, tools or even with a program such as Dragon Naturally Speaking that uses voice control. I would like to say that this program is a major step in new technologies that can change the world.
Enable Viacamは、他の自動化スクリプト、ツール、または音声制御を使用するDragon Naturally Speakingなどのプログラムでも使用できます。 このプログラムは、世界を変えることができる新しい技術の大きな一歩であると言いたいです。
If you can, please consider a donation to Cesar Mauri, the author of this software.
可能であれば、このソフトウェアの作者であるCesar Mauriへの寄付を検討してください。
◆Windows Vista/7/8/10 ユーザーに注意
it's recommended to disable the User Account Control (UAC) to run eViacam properly. With UAC enabled problems may arise, specially the inability to confotm elevation prompts or to open the on-screen keyboard shipped with the system(osk.exe). These issues are under investigation.
eViacamを正しく実行するには、ユーザーアカウント制御(UAC)を無効にすることをお勧めします。 UACを有効にすると、特に昇格プロンプトを構成できない、またはシステムに付属のオンスクリーンキーボード(osk.exe)を開けないという問題が発生する場合があります。 これらの問題は調査中です。
eViacamを正しく実行するには、ユーザーアカウント制御(UAC)を無効にすることをお勧めします。 UACを有効にすると、特に昇格プロンプトを構成できない、またはシステムに付属のオンスクリーンキーボード(osk.exe)を開けないという問題が発生する場合があります。 これらの問題は調査中です。
●Enable Viacam のインストール
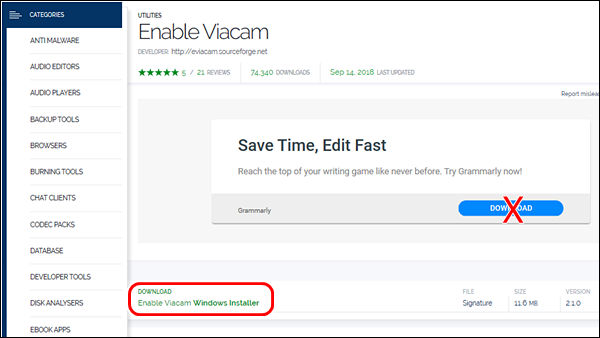
(1)https://eviacam.crea-si.com/ を開き、[Download] をクリックする。
(2)[Windows Installer] をクリックし、ファイルを保存する。
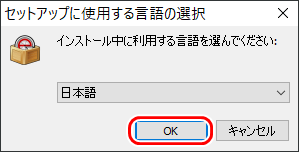
(3)ダウンロードしたファイル(eViacam-2.1.0.exe) を実行する。
(4)”セットアップに使用する言語の選択” ⇒ 日本語 [OK]
(5)”使用許諾契約書の同意” ⇒ ●同意する [次へ]
”インストール先の指定” ⇒ [次へ]
”プログラムグループの指定” ⇒ [次へ]
”インストール準備完了” ⇒ [インストール]
”情報” ⇒ [次へ]
”EnableViacamセットアップウィザードの完了” ⇒ [完了]
(2)[Windows Installer] をクリックし、ファイルを保存する。
(3)ダウンロードしたファイル(eViacam-2.1.0.exe) を実行する。
(4)”セットアップに使用する言語の選択” ⇒ 日本語 [OK]
(5)”使用許諾契約書の同意” ⇒ ●同意する [次へ]
”インストール先の指定” ⇒ [次へ]
”プログラムグループの指定” ⇒ [次へ]
”インストール準備完了” ⇒ [インストール]
”情報” ⇒ [次へ]
”EnableViacamセットアップウィザードの完了” ⇒ [完了]
●Enable Viacam の初回起動時
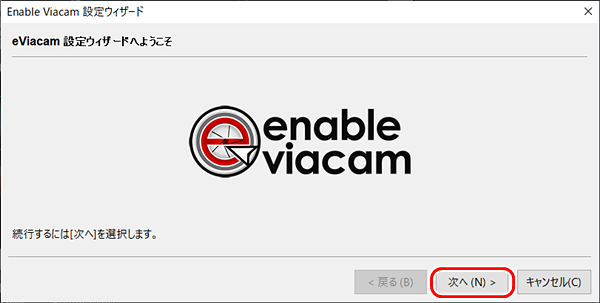
(1)デスクトップのアイコン(eViacam)をダブルクリックする。設定ウィザードで [次へ] をクリックする。
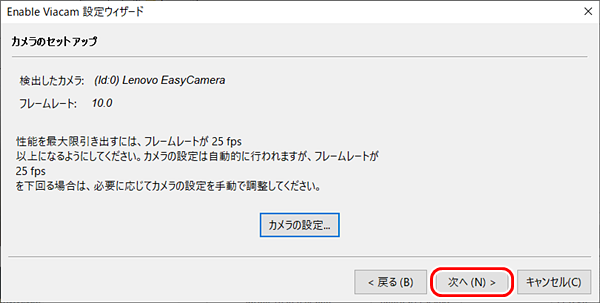
(2)カメラのフレームレート(FPSとは、frames per second で、コマ/秒 )が測定される。推奨の25fpsを満足していない。[次へ] をクリックする。
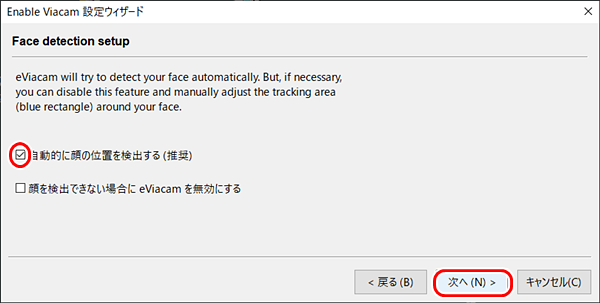
(3)顔検出の設定
eViacamは顔を自動的に検出しようとします。 ただし、必要に応じて、この機能を無効にし、顔の周囲の追跡領域(青い長方形)を手動で調整できます。
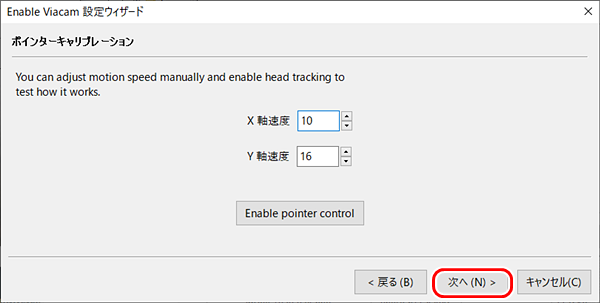
(4)ポインターキャリブレーション
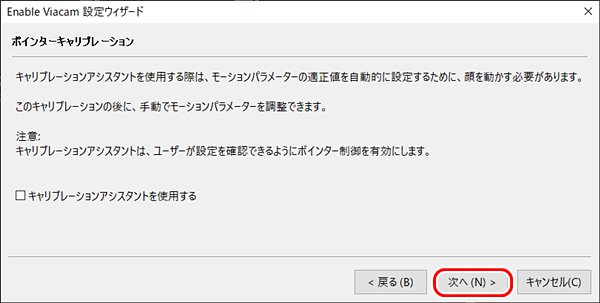
(5)ポインターキャリブレーション
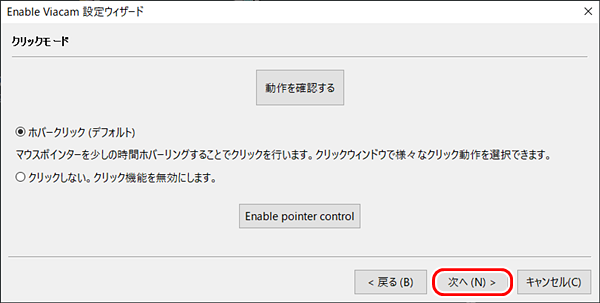
(6)クリックモード
(2)カメラのフレームレート(FPSとは、frames per second で、コマ/秒 )が測定される。推奨の25fpsを満足していない。[次へ] をクリックする。
(3)顔検出の設定
eViacamは顔を自動的に検出しようとします。 ただし、必要に応じて、この機能を無効にし、顔の周囲の追跡領域(青い長方形)を手動で調整できます。
(4)ポインターキャリブレーション
(5)ポインターキャリブレーション
(6)クリックモード
●Enable Viacam の設定
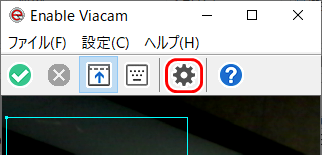
(1)[設定]アイコンをクリックする。
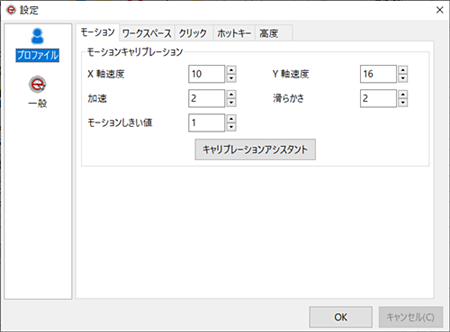
(2)モーションキャリブレーション
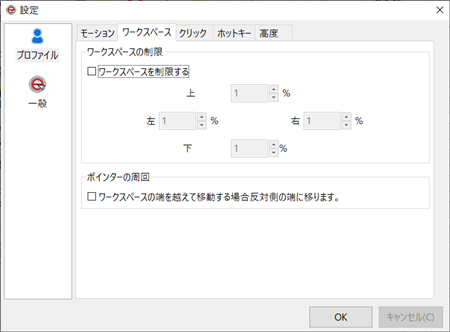
(3)ワークスペースの制限
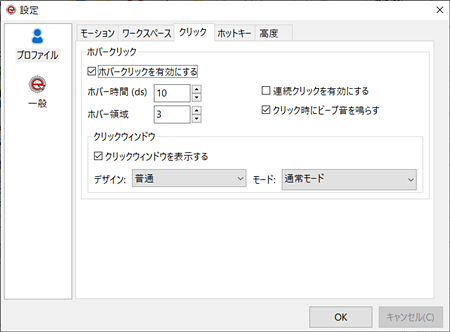
(4)ホバークリック(「滞留時間」でクリック)
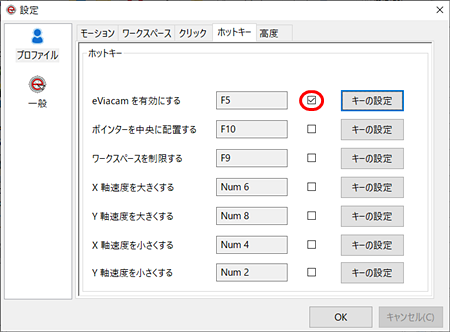
(5)ホットキー
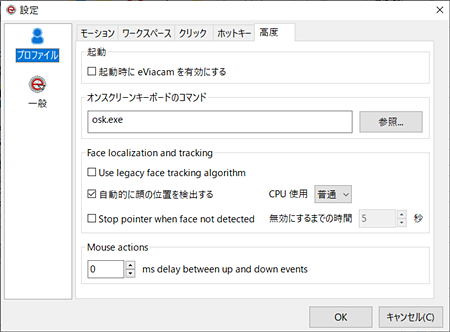
(6)その他の設定
(2)モーションキャリブレーション
(3)ワークスペースの制限
(4)ホバークリック(「滞留時間」でクリック)
(5)ホットキー
(6)その他の設定
●マウス補助機能
マウスの中央クック、右クリック、ドラッグ、ダブルクリックを実行する前に押すボタンが、上部に表示されます。このボタンのサイズはマウスカーソルで押しやすいです。

●”Camera Mouse” と”Enable Viacam”の比較
設定できる項目はほぼ同じだし、顔の認識率も同程度だと感じました。あとは、細かい使い勝手の差だけです。
良い点は、マウス補助機能が、”Camera Mouse” よりも使いやすいです。
悪い点は、”Enable Viacam”を無効にする方法がカメラウインドウの赤丸に[X]のアイコンをクリックするしかない。しかも、そのアイコンが小さい。”Camera Mouse”のようにマウスを動かしたら無効になるなどの他の手段があったほうがいいです。
決定的にダメなのが、起動時にユーザーアカウント制御(UAC)のメッセージが出ること。これが改善されることを望みます。UACを無効にして使うのは、セキュリティ上、お勧めできないです。スクリーンキーボードが起動できない不具合は、このアプリのアイコンから起動させなければいいだけなので問題ではないです。
◆連載
- 【まほろば】顔でマウスを操作する 1
- 【まほろば】顔でマウスを操作する 2
◆関連記事
- 【まほろば】Windowsのマウス操作向け設定 (Windows設定)
- 【まほろば】Windowsのマウス操作向け設定 (Edge)
- 【まほろば】Windowsのマウス操作向け設定 (ショートカット)
- 【まほろば】Windowsのマウス操作向け設定 (アクセシビリティ機能)
- 【まほろば】Windowsのマウス操作向け設定 (マウスジェスチャ)
- 【まほろば】Windowsのマウス操作向け設定 (Point-N-Click)